What is Trenchless Sewer Repair

What is Trenchless Sewer Repair

Trenchless sewer repair is a technique for fixing damaged pipes without excavating your yard. It uses advanced pipelining and pipe-bursting techniques to solve problems that ordinary sewers can’t handle. It’s a much safer alternative to excavating and replacing an entire sewer line, which can be a costly and disruptive project for homeowners.

Trenchless Sewer Repair Advantages

  • More accessible and quicker method of fixing your sewer pipes.
  • Potentially lower costs.
  • The lifespan of fixed pipes is 50 to 100 years.
  • Less damaging to the environment than excavation.
  • No digging is necessary.

What Makes Trenchless Sewer Repair Necessary?

You need trenchless sewer line repair when your line leaks from a crack or broken section that is out of reach.

Your sewer line may need to be repaired for a variety of reasons as it ages, including:

  • Sediment Accumulation

Sediment and other types of buildup can accumulate in PVC and metal pipes, resulting in a clog. If you put off cleaning the drain, the obstruction may cause a leak because of the added pressure it will put on the pipe’s material. Mineral deposits form more quickly under complex water conditions than in soft water conditions.

  • Settlement

The settling of dirt can cause pipe sections to come loose or, in some cases, sag. The proper flow of water (and waste) through the system is restricted when these “sags” form. A belly in a sewer line is what it is known as, and if it is severe, it might need to be fixed.

  • Corrosion

The term “corrosion” describes the process by which metal rusts. It happens naturally but more quickly when hot water and high water pressure are present.

What Is the Process for Trenchless Sewer Pipe Repair?

Trenchless sewer replacement can be accomplished in two ways: pipe bursting and pipe lining.

The pipe bursting approach involves inserting a missile-like device into one end of the sewer line. Its function is to move steadily forward, breaking apart your old pipe as it goes. A new, flexible sewer line is attached to the back of the device and immediately takes the place of the old line.

When you choose pipe lining (also known as trenchless sewer repair), your old pipe is not harmed or removed. An epoxy-coated sleeve is instead inserted into your existing sewage drain by a crew. The sleeve is then inflated and allowed to cure, resulting in the formation of a new pipe within the old one.

Final Thoughts

Trenchless sewer pipe repairs are only successful when the condition of the damaged pipeline is known. If it’s collapsed, back pitched, or improperly graded—repair methods won’t solve those problems. Trenchless sewer line replacement enables damaged pipes to be replaced with minimal inconvenience and without needing digging trenches.

Gray Plumbing has the expertise and tools necessary to deliver the outcomes you want in plumbing services. We’re the most experienced trenchless sewer repair company in the area, and we’ll have your problem fixed right away. We’re committed to providing quality customer service and delivering results that exceed expectations. Call us now!

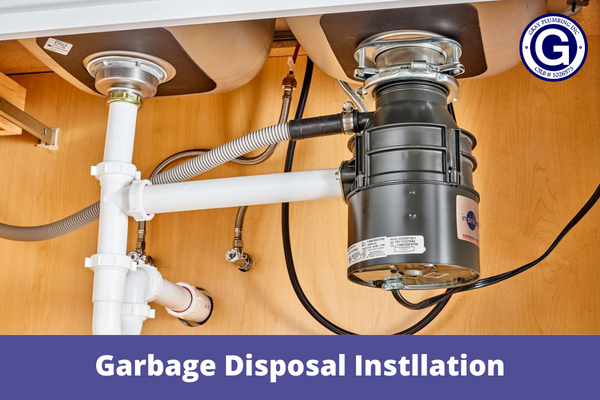
Do I Need A Plumber To Install A Garbage Disposal

Do I Need A Plumber To Install A Garbage Disposal

You flip the switch, turn on the faucet, and the garbage disposal stops working after a grunt, leaving you with a sink full of leftover food bits. Uh oh! Consider changing the unit yourself before hiring a plumber.

YES, you can certainly install your garbage disposal, and the process for a mechanically inclined homeowner should take no more than an hour. If you undertake this task, you should look for a replacement disposal that is the same brand as the one you already have and is as similar to the same model as possible. If a compatible unit is installed, there will be no need to modify any existing pipes to make them fit, saving time and money.

For a competent DIYer, installing a garbage disposal is a reasonably simple task. Follow these steps to learn how to install a garbage disposal with a few simple tools.

First Things First

Set up a trash compactor. A garbage disposal, whether being replaced or installed for the first time, will have a discharge that connects to the drainpipe and will be fastened to the sink. The disposal is where the hose from your dishwasher empties.

In most cases, you can choose from 1/3 horsepower up to 1 horsepower for your garbage disposal. You should get disposal compatible with your septic system if you have one. Make sure your needs align with the manufacturer’s suggestions.

1st Step:

As a first step, disconnect the kitchen’s power. First, turn off the water supply and place a bucket beneath the P-trap. Take out the filter and the excess plumber’s putty from the sink.

2nd Step:

Using the plumber’s putty, secure the flange in place. To prevent the disposal from slipping, place a towel over the sink’s flange before setting it in place.

3rd Step:

A fiber gasket, a backup flange, and a mounting ring are stacked under the sink and placed onto the flange’s bottom. Snap the ring into place by opening it and then closing it. Apply even pressure with the screwdriver to snug the screws up against the backup flange, and then remove any stray putty.

4th Step:

To connect the disposal to the dishwasher drain, you must first remove the stopper from the drain intake by hammering it out.

5th Step:

Then, you’ll need to disconnect the wire cover plate and connect the power cord (power cords may be sold separately). Reconnect the wires and replace the cover.

6th Step:

To connect the drain, place the gasket in the discharge outlet, then use the flange and bolts to secure the discharge tube. Align all three tabs with the mounting ring and hang the disposal. Turn these tabs over the ridges using the provided wrench to fasten them. Join the drain hose to the sink. Attach your drainpipes and tee pipe before your P-trap to ensure proper water flow.

If In Doubt, Call A Professional

Come on, let’s not sugarcoat this. Few people who read this site are competent at dismantling and reassembling a kitchen sink. If you wanted to, you’d be doing it now; if you’re having second thoughts, give Gray Plumbing a ring. Many customers choose us because they know they can count on us to provide the quickest and most secure expert assistance possible. Contact us now!

Where to Install a Water Softener

Where to Install a Water Softener

Water softeners are nothing short of a blessing for homes with hard water or water high in magnesium and calcium. But you already know that if you’re here. We’re willing to wager that you’re unsure of your ability to add a water softener to your current plumbing system.

Installation of a Water Softener

It’s generally a good idea to install the new system in place of the old one when replacing it to avoid making further adjustments. However, before installing a new water softener, you must consider these recommendations.

It would help if you often put water softeners as soon as feasible in the plumbing system surrounding your home to protect all pipelines from the risks of hard water.

The mineral deposition caused by hard water can drastically shorten your plumbing’s lifespan. However, the majority of plants require hard rain to grow. Therefore, be sure to locate an appropriate location to connect your system.

The same goes for people on low-sodium diets; soft water may not be the best option. Additionally, it reduces the amount of calcium and magnesium that homeowners consume. So you can split a line of water for your kitchen faucet while at it.

Installation Outside

The ideal temperature range for water softeners is between 35 and 100 degrees. Both frigid temperatures and exposure to direct sunlight will hinder their performance.

However, not all homes have basements or garages. You can place the softener outside if you have no other options. Put it beneath a shed or other covered area. To reduce exposure to harsh weather, some water professionals dig a trench in the ground before installing the unit.

Looping Soft Water

Thankfully, the plumbing system in some contemporary homes already has a soft water loop. A pipe portion emerges from the wall in the shape of a “U” and then reenters the wall at two different locations.

Consider yourself lucky if you find one near a drain and an electrical outlet in your home. You have a lot of work on you. You can link your water-softening system to your home’s internal plumbing using a soft water loop. Its main goal is to keep soft water out of outside taps and hoses by separating the inside and external plumbing systems.

Who Performs Professional Installation of Water Softeners?

A water softener installation may not be suitable for everyone. In that scenario, employing a qualified expert will assist you in literally staying afloat!

Considering your financial situation and location, if you engage a professional, consider the following possibilities.

Retail

Large water equipment retailers will install your unit for a fee. They use professional contractors for the job.  This approach is convenient, inexpensive, and time-saving because the retailer handles everything.

Local Plumbers

Local plumbers know the area’s plumbing and can install any water treatment system. You can shop around to find the highest cost.

Gray Plumbing is a trusted name in water softener installation. We offer professional and reliable service at an affordable price. Our trained plumbers will ensure your system is properly installed for years of trouble-free use. Contact us now!

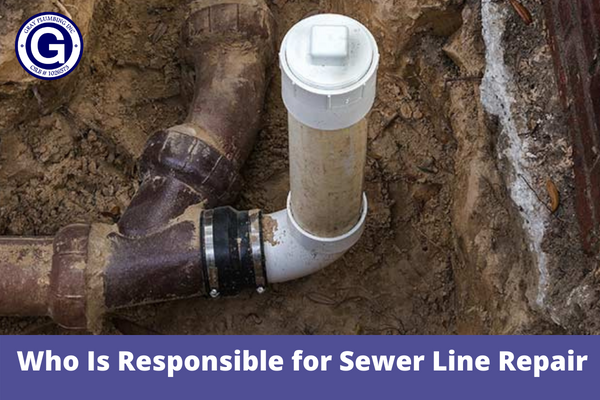
Who Is Responsible for Sewer Line Repair

Who Is Responsible for Sewer Line Repair

Many people think that the municipality should be in charge of maintaining and fixing sewer connections that connect their property lines to the main city sewers. However, the sewer pipes that carry sewage from the main underground sewer line to the treatment plant are primarily the city’s responsibility. The lines connecting the home to the main sewer line are the homeowner’s responsibility equally.

Repair of Sewer Lines Homeowners Insurance Coverage

It is the homeowner’s responsibility to take preventative measures against sewer line issues like sewage backup. However, insurance can cover it if the cause is something beyond the property owner’s control. Some of the explanations for why homeowner’s insurance might pay for sewer line repairs include the following:

  • Explosion
  • Lightning
  • Hailstorm
  • eruption of a volcano
  • Vandalism
  • Fire Civil commotion

Therefore, it’s an excellent view to check with the insurance provider first to determine if it comes under coverage if the sewage line needs repair due to unanticipated circumstances beyond their control. Before beginning repairs, a skilled plumber can evaluate the scope to avoid waiting for the insurance provider to confirm coverage.

Tips for Avoiding Sewer Line Issues

Spending a small sum on preventive rather than a large sum on repairs is usually preferable. Your sewer line can be kept clear and unclogged by doing the following:

  • It would help if you didn’t flush sanitary napkins or wet wipes into the toilet.
  • At the very least once every month, use an enzyme drain cleaner.
  • You should do rooter cleaning at least once each year.
  • Avoid placing trees and other vegetation close to sewer lines.
  • You should replace clay and lead pipes to avoid corrosion.

But if the sewage line breaks, it could be time to call in the pros. You can rely on the expert sewage line repair and replacement services we provide at Alliance Service Pros. Along with fixing sewer line issues successfully, we also use enzyme and standard drain cleaning techniques as preventative steps.

Notify the technician of any obvious sewage issues, such as water leaks in the yard or drains that smell terrible. Our specialists can evaluate the condition promptly and repair or replace it.

How Much Does Repairing a Sewer Line Cost?

Homeowners frequently pay $2,250 to $5,750 to fix their main sewer line. Depending on the length, diameter, and quality of the necessary pipe and whether a significant portion of the sewer line needs replacing, the cost might reach $30,000.

PVC is the material of choice in the industry for sewer line repairs and replacements since it is affordable, clog-resistant, and incredibly long-lasting. Remember that the cost of a sewage repair depends on several elements, including the amount and depth of digging necessary, the soil’s condition, and anything else that can add to the project’s complexity.

Employing specialists can help you find the issue’s core cause fast, fix it, and stop the interruptions in your home. Gray Plumbing is prepared to do any task for you. We can finish any repair task with the expertise and cutting-edge understanding required.

What Is Commercial Plumbing?

What Is Commercial Plumbing

Starting a plumbing company is easier if you focus on a particular specialty. The tools you buy, the courses you take, the permits you apply for, and the approach you take to advertising will change due to this. There is a significant difference between commercial plumbing and residential plumbing. Although they may seem synonymous at some point, most plumbing companies focus on one or the other.

What Makes Commercial Plumbing Distinct

In commercial plumbing, there are a few crucial elements. They are the reason why even the best plumbers struggle with what seems like a simple task in a high-rise.

Size Of The Project

Commercial plumbing systems are more elaborate and substantial. There will be more complex water systems, larger structures, more advanced machinery, and more complex issues to solve. Boilers, fire suppression systems, pipes, etc., are all examples of industrial-grade equipment found in commercial buildings. Commercial construction quotes require extensive itemization of both labor and materials to increase the likelihood of quick approval.

Standards For Maintenance

Preventive plumbing maintenance is essential for commercial plumbing to avoid catastrophic failures. The systems at a hospital or other life-critical facility cannot afford to malfunction. Plungers and pipes are used nonstop, around the clock, every day of the week; thus, they need to be sturdy to bear the pressure.

Maintenance contracts are helpful for contractors providing services to structures for this reason. Both the client and the contractor benefit from this arrangement since it prevents the need for unexpected and expensive repairs. Even a routine maintenance visit can result in extra pull-through work.

Rules And Regulations

Commercial plumbing systems are heavily regulated due to many individuals and businesses relying on them. Health and safety are among the most visible forms of control. 

In food service establishments and healthcare facilities, water and waste disposal systems must adhere to several health code criteria and regulations.

Effectiveness

Industrial settings are more vulnerable to leaky faucets and inefficient heaters. Commercial plumbers are responsible for ensuring the efficacy of these plumbing systems, which otherwise result in a significant waste of energy and resources during maintenance and repair.

If unchecked, they can potentially inflict significant material and financial loss. Now imagine that a sink on the 50th story of a building suddenly began leaking and will continue so for the next four hours. Pooling water would be disastrous for the subfloors.

Working Time

Timing is a crucial concern that isn’t discussed nearly enough. When it involves residential plumbing, customers usually wait for you to come at a convenient time. That’s not so easy to do in commercial areas frequented by hundreds of people daily. Commercial plumbers often need to go at odd hours or on weekends to turn off the water supply. It’s also possible that commercial plumbers will need to improvise their makeshift plumbing facilities if the work takes more than a day to complete.

For Your Commercial Plumbing Needs, Call Us!

It is essential to choose a commercial plumber who is not only qualified to complete the job but who also stands behind their expertise with guarantees on both parts and labor. So choose Gray Plumbing; you can rest easy knowing that we meet all legal requirements and are adequately covered by insurance. When you call, we’ll get to you right away. Contact us now for any plumbing problems!

Does Coconut Oil Clog Drains

Does Coconut Oil Clog Drains

Coconut oil has rapidly risen in popularity in recent years, and now nearly every home has some on hand. Besides washing your hair and body, you may also use them to clean your teeth. But the issue remains: is coconut oil harmful to your plumbing, even though it could be good for you?

To put it simply, yes. The plumbing in your home will suffer if you use coconut oil. Too much coconut oil use can rapidly lead to a clogged house. We are your most excellent option if you’re seeking a fix. Whenever domestic difficulties arise, we are here to assist you in finding solutions.

The Plugging Caused By Coconut Oil

Let’s rewind and discuss why and how coconut oil causes plumbing problems. Coconut oil, however, has a peculiar property in that it becomes solid below a specific temperature. If you’ve ever worked with coconut oil, you know it behaves like oil while it’s heated but like a solid when it cools. The melting temperature of the coconut oil is around 76 degrees. It can only clump and cause a clogged drain if you take a freezing shower or bath. While not common, it does occur. Coconut oil, if present in cold pipes, will solidify until heated by the passage of water.

Natural Methods For Unclogging Drains (Without Commercial Drain Cleaners)

The following remedy is an excellent all-natural option for unclogging drains that have become backed up.

  • The drain should be flushed with two cups of hot water.
  • Then, flush the drain with half a cup of baking soda. Use your hands, if necessary, to wash all the baking soda down the toilet.
  • There will be bubbles when you pour 1 1/2 cups of white vinegar down the drain. Indeed, this is excellent news! The bubbles aid in dislodging the grime that has built up in your pipes.
  • Wait 5 minutes before stirring again.
  • When you’re done, pour additional boiling water into the drain to flush it out.

Additional Typical Causes of Drain Clogging

Is there anything else wrong with the drain that you can see? It’s also possible for your home’s plumbing to be affected by the following more widespread problems:

  • Wet wipes (despite their advertising, they should not be flushed down the toilet)
  • Dental floss
  • Deposition of minerals
  • Deep in the ground, like tree roots
  • Wet wipes made of cotton
  • Litter box
  • Dirt

Your sink is meant solely for food scraps, soap, and liquids. It would help if you didn’t flush anything but human excrement and toilet paper. A home’s cleanliness and comfort can be jeopardized if items other than those listed above are flushed or poured down the drains.

In Summary

Coconut oil, like other cooking oils, is sticky at room temperature but becomes problematic as it cools and adheres to pipes. Don’t put fats, oils, mayonnaise, fatty meals, or grease from cooking down the drain. All of these things likely contribute to clogged drains and sewage backups. 

All of these techniques are effective in preventing clogs and other drainage issues in the home. Talk to our experts for specialized advice on improving your working conditions at home. If you need a plumber, call Gray Plumbing. Many individuals choose us because they know they can rely on us to provide the quickest and most secure expert assistance possible.


How To Repair A Kitchen Faucet

How To Repair A Kitchen Faucet

The time and effort required to repair a leaking kitchen faucet are typically lower and shorter than anticipated. To fix a leaking faucet, you can use vinegar to loosen any obstructions or replace the parts. Depending on the style of your faucet, different elements may eventually need to be replaced. The faucet may be restored to like-new condition by keeping track of the individual parts and reassembling them at the end of the job.

You are in the correct place; if you’re looking for a guide in repairing kitchen faucets, just follow these steps.

Beginning Preparations For Repair

Find the source of the leak. To start, you should look at the faucet and see where the leak comes from. Leaks commonly originate at the faucet’s base or spout. 

Shut off the water to the sink. Start by checking the area beneath the sink. To prevent water from flowing into the faucet, you may find a set of valves that you could turn clockwise.

You can reduce the water pressure by opening the faucet. Ensure the water has been turned off before disassembling the faucet. 

Filters can be placed above drains to gather debris. Losing a little but vital part is never fun. Strainer baskets prevent additional cleaning. If you don’t have filters, use rags or towels.

Label and photograph each component as you take apart the faucet. After you’ve fixed the tap, put everything back together in the same order you found.

The faucet’s parts may be cleaned with vinegar. In some parts, mineral deposits are prevalent. First, soak the components in vinegar to soften them, then scrub them with a microfiber cloth or abrasive nylon pad. 

Different Types Of Faucets To Repair

Ball Faucet Repair

To take the handle off, you’ll need an Allen wrench.

Repair leaks at the base of the handle by tightening the adjustment ring.

To take off the top, you must turn it anti-clockwise.

If the metal ball is damaged, remove it and replace it.

Changed the rubber rings and the springs.

Fix the water source by putting it back together.

Cartridge Faucet Repair

Use a knife to pry off the cover of the handle.

To take the handle off, you’ll need an Allen wrench.

Take apart the dome by hand and set it aside.

Use a Phillips screwdriver to remove the metal handle adapter.

Use pliers to remove the clip holding the retainer in place.

Twist the cartridge out of the device using pliers.

Get a new cartridge and install it in the tap.

Ceramic Disc Faucet Repair

Take a knife and open up the cover that conceals the screws.

Take off the handle using an Allen wrench.

Twist off the metal top with pliers.

Take the disc cartridge out using a screwdriver.

The cartridge’s rubber gaskets should be replaced.

The o-rings of the plastic disc should be replaced.

Pour vinegar via the faucet’s openings.

Lastly, put the sink back together.

An experienced plumber can fix most plumbing emergencies quickly and effectively. A simple phone call to Gray Plumbing will solve even the most common plumbing issues, such as a dripping or nonworking tap or faucet. We’re equipped to manage jobs of this kind and can solve your minor plumbing problems quickly and efficiently. When it comes to problem-solving, there is no challenge that our group cannot meet. CALL NOW!

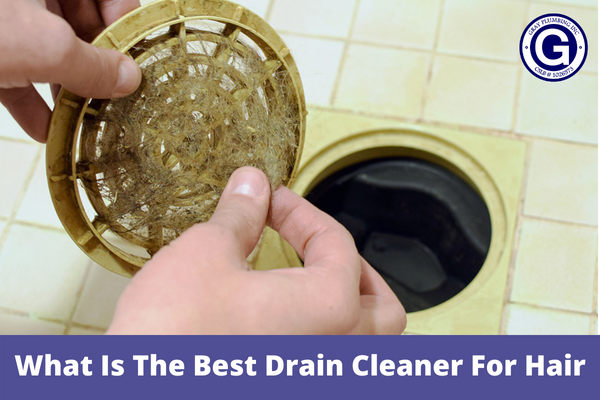
What Is The Best Drain Cleaner For Hair

What Is The Best Drain Cleaner For Hair

Particularly in bathrooms, hair is one of the most typical things to cause drains to become stopped up. Loose strands have a habit of finding their way into drains, such as those found in sinks and bathtubs, which, over time, can cause obstructions in the pipes that connect the two. However, because the best drain cleaners for hair all claim to achieve the same goal (removing clogged hair and debris), it is essential to focus on how they accomplish this goal and determine which hair removal method will work best for you. This is because the best drain cleaners for hair all claim to achieve the same purpose. 

1. Best Basic Drain Snake – Vastar 4 Pack 19.6 Inch Drain Snake Hair Drain Clog Remover Cleaning Tool

  • Acrylonitrile butadiene styrene 
  • 19. The 6″ flexible barbed wand can easily grip and remove impediments like clusters of hair, food, or trash. 
  • Four packs of plastic drain augers and plumbing snakes 
  • Excellent drain tool for clearing obstructions in sink and shower drains; flexes at P-trap 
  • Less expensive and more environmentally friendly than drain cleaners with harmful chemicals 
  • Soft enough to bend in various strainers and pipes, perfect for bathtubs, showers, kitchen, bathroom, and utility sinks.

2. A Drain Auger Worthy of Investment – General Pipe Cleaners R-25SM Spin Thru Drain Auger with 1/4-Inch by 25-Feet Cable (P-25SM)

If hair clogs are a tiresome, recurring issue, consider investing in a spin-through drain auger. At $25, it’s a fraction of the cost of a plumber’s visit, and unlike chemical cleansers, you won’t need to keep buying it. Feed the metal cable into the drain to operate. When you approach the hair clog, you tighten the thumb screw and turn the hand crank to “drill” the metal cable into the obstruction, cleaning it out. Then, rinse any remaining hair down the drain. This tool’s steel canister and easy-to-grip handle are best for 2-inch gutters. Amazon reviewers have awarded it a nearly four-star average rating despite a steeper learning curve than the other products on our list.

3. The Best Chemical Drain Cleaner – Green Gobbler Drain Clog Dissolver, 31 oz

  • Dissolves flushable personal care wipes, soap, toilet paper, and hair.

Put an end to backed-up drains once and for all, and forget about the filthy chore of plunging into clogged toilets! Green Gobbler’s compelling composition dissolves soap scum, hair, toilet paper, flushable personal care wipes, and other organic debris that may be clogging your pipes, in addition to clearing blocked drains. 

  • This drain and pipe cleaner is a simple and effective solution to clear obstructions. 

It comes in easy-to-use packaging and has a powerful and effective formula. No need to measure with our dual-chamber bottle’s two pre-measured applications! 

  • Multiple USES

This drain opener is secure for pipelines, sinks, tubs, and showers. The solution doesn’t contain bleach or sodium hydroxide and is non-corrosive to pipes. 

  • REFUND GUARANTEE

Green Gobbler provides a 30-day hassle-free money-back guarantee. If unsatisfied with your outcomes, get in touch with our customer care team. 

Hair is truly one of the most common things that get caught in drains, and when you don’t have a good cleaner on hand, it can be a real pain to get out. At Gray Plumbing, we’re here to help you with your hair clog problems so you can get back to enjoying your day. We address and fix drain issues promptly, efficiently, and at reasonable rates.

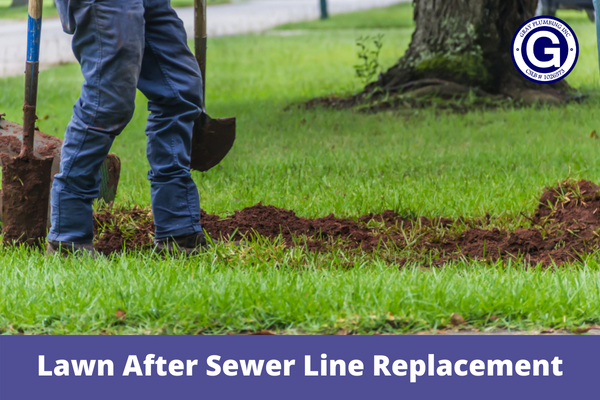
How To Repair a Lawn After Sewer Line Replacement

Lawn After Sewer Line Replacement

Repairing a septic tank or sewage lines in your yard may do a significant amount of damage, both visible and invisible, to the grass in your yard. When other work or abnormally strong traffic, your cherished lawn may seem less than its best, with dirt heaps, holes, barren areas, and other less evident but still significant concerns like compaction. This may be the result of construction, traffic, or both. Although a site will recover most quickly in the spring or fall, which are the ideal times for planting grass seed, excellent care encourages the rapid restoration of a lawn’s attractive appearance at any time throughout the year. This is true even though spring and fall are the ideal times for planting grass seeds. 

If you need to repair a lawn that will be ripped up in areas because of a sewer replacement project, there are a few things you can do to make the task more straightforward and more successful. One of these things is getting the grass aerated before the process begins.

Removing Of Debris

Using a metal garden rake or a leveling rake, start moving the soil around and make it as level and even as possible by removing all debris such as rocks, sticks, and other objects, breaking up any large clods of soil, loosening the top several inches of the ground in the site if it is compacted, and removing any large clods of dirt that are present.

Restore Driveways

Take note of the spots where people or cars have driven on the grass while repairs are being done. Heavy vehicles have a compacting effect on the ground, making grass challenging to grow in that area.

Cultivating Soil 

  • Spread a beginning fertilizer over the bare soil at a rate of no more than one pound of nitrogen per 1,000^2 feet of bare ground, and then work the fertilizer into the top two to four inches of the soil. Some examples of starter fertilizer formulas are 5-10-5, 16-20-0, and 5-20-10.
  • Over the bare soil, sow grass seeds of a species and cultivar similar to the grass found in the surrounding area. The amount of grain that should be used depends on the species and may vary from one pound to more than eight pounds per one thousand square feet of soil. Distribute the seed so that it is evenly spread throughout the area.
  • Cover the seed with approximately 1/16 inch of dirt and ensure it is firmly in touch with the soil by raking it in and then tamping it down with a hand tamp or a lawn roller.

Maintaining The New Yard

It is essential to softly water the portion of the lawn that has just been seeded each day or as required so that the top one to two inches of soil in the patched site stay damp but not soaked. After the seedlings have emerged and been established, you may progressively reduce the irrigation frequency while increasing the quantity of water delivered during each watering. After it has been found, the grass requires just a once- or twice-weekly watering that is sufficiently thorough in moistening the top 4 to 6 inches of soil.

Gray Plumbing specializes in these repairs and helps homeowners avoid unpleasant excavations. We are also capable of repairing the majority of broken sewage lines without the need for any demolition, hole, or restoration work. Get in touch with us now!

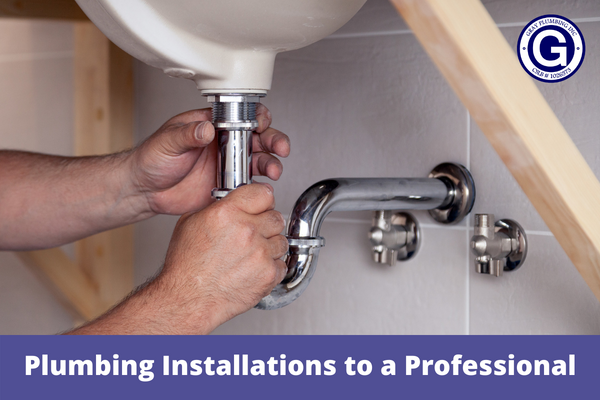
5 Reasons to Trust Your Plumbing Installations to a Professional

Plumbing Installations to a Professional

Do-it-yourself plumbing projects around the house can frequently result in financial savings. With the correct equipment, do-it-yourself homeowners who are handy may repair running toilets, minor leaks, and clogged drains. Local home improvement stores make it simple to locate the components you need and provide helpful advice. 

However, if you want to safeguard your property from water damage, it is recommended to leave most plumbing repairs to the professionals at Gray Plumbing. To effectively find and repair leaks, safely install gas lines, and clear drains without harming pipes, our plumbers are required to undergo comprehensive training, take education courses, and have years of experience working on the job.

1.Expertise In The Field

A plumber is someone who has undergone significant training in addition to having extensive knowledge and expertise. A licensed plumber has the experience and abilities necessary to ensure that the job is done the first time correctly, with lasting results. This applies to the installation of pipes as well as the repair of leaks and other concerns.

2.Proper Tools And The Right Equipment

If you hire a professional plumber in Gray Plumbing, the plumbers you receive will come prepared for the task at hand with all of the necessary equipment and supplies. It will save you hours you would have spent driving to and from the hardware store to pick up parts and purchase tools you will never use again.

3.Guaranteed Trustworthy

Any competent plumbing firm that is worth doing business with will provide written guarantees for their work and the fixtures or equipment they install in your home. These guarantees will be offered regardless of the price of the service. We strongly recommend that you make the intelligent choice and give us a call. We are delighted to assist you in whatever way we can, as well as answer any concerns you might have!

4.Permanent Solutions

Our plumbing service offers long-term solutions instead of temporary ones that only last for a few months. We will always present you with the option that solves the issue at the lowest possible cost while preventing it from happening again. Similarly, we know everyone is working with a certain amount of money. That is why all of the possibilities, together with the benefits and drawbacks of each one, are laid out for you. It will allow you to decide how to continue while basing your choice on accurate information.

5.Emergency Services At Any Time

Any moment could see the onset of a critical situation. Your drainage system could get clogged at any moment, and your pipeline could burst at any minute. Therefore, more immediate action is required to be taken. If you need assistance at any time of the day, you can get in touch with our trained experts whenever you like. Our competent employees will always ensure to instantly come to the rescue and address the problem as quickly as possible.

Gray Plumbing believes our work should be guaranteed, and we adhere to this principle. Before we can begin working on your project, we will be pleased to talk to you about the warranty associated with the kind of work you need to do. Call us today!