Who Repairs Garbage Disposals?

Who Repairs Garbage Disposals

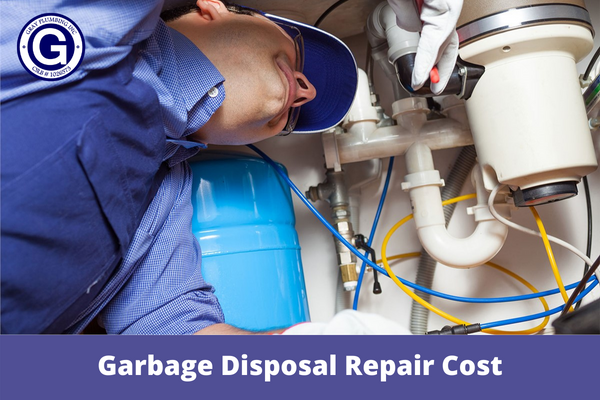
A clogged or malfunctioning garbage disposal can be incredibly frustrating. Not only does it stink up your kitchen, but it can also be a safety hazard.

The good news is that garbage disposal repair is often a simple process. However, many people are unsure who to call when their disposal needs to be fixed. 

In this blog post, we’ll explore who repairs garbage disposals and what you can expect from the repair process.

Who Do You Call for a Garbage Disposal Issue?
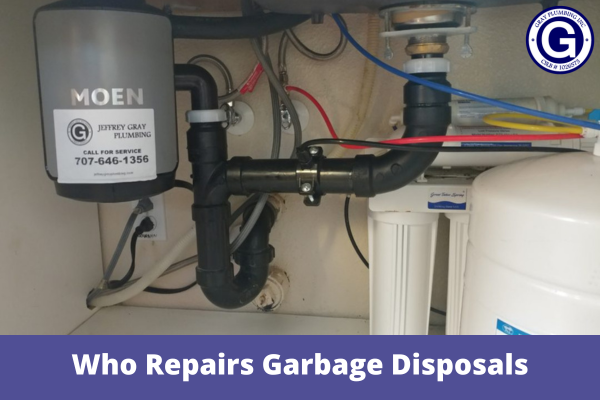
Plumbers

Plumbers are often the first port of call for garbage disposal issues. They’re extensively trained to work with these appliances and are equipped to diagnose and repair them promptly. Their expertise ensures your disposal will be up and running in no time.

Appliance Repair Technicians

Many appliance repair technicians handle garbage disposal repairs, often at a more affordable cost than plumbers. They possess the necessary tools and expertise to diagnose and fix most disposal issues. However, it’s crucial to choose an experienced technician specializing in garbage disposal repairs.

Handymen

Handymen can repair garbage disposals at an affordable price, but not all have experience. Ask before hiring. If you’re on a budget and open to some risk, a handyman is a good choice.

DIY Repairs

If you’re handy with tools, you could try a DIY repair for disposal issues like unclogging the drain or fixing a jam. But for severe problems, like a motor malfunction, professional help is best. Don’t risk causing more damage if you’re not confident or skilled enough.

Is It Worth It to Repair a Garbage Disposal?

Garbage disposals are popular in many US homes, efficiently grinding up food waste to keep kitchens clean. But when they break down or become inefficient, should you repair or replace them?

Here are the factors to help you decide if repairing your garbage disposal is worth it.

Understanding the Costs

When repairing a garbage disposal, consider the cost, which varies based on damage and parts replacement. Basic repairs cost $100 to $250, while replacement ranges from $200 to $550.

Age of the Disposal

Consider age when deciding to repair or replace a garbage disposal. If it’s newer and well-maintained, repair may be an option. However, for older disposals, other issues may outweigh the benefits of repair. Overuse and wear can reduce efficiency.
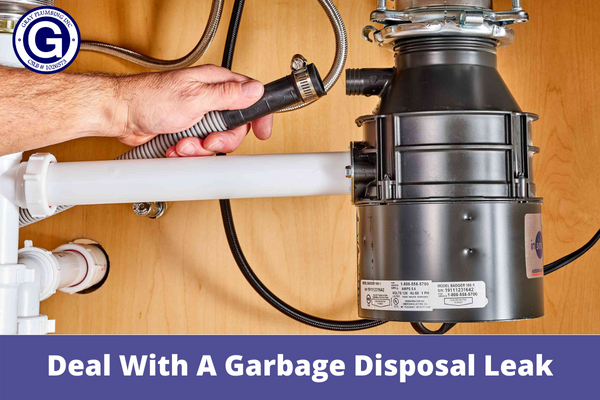
Type of Damage

The extent of damage to your disposal determines whether it should be repaired or replaced. Minor issues like jams or clogs can be fixed, but major damage such as cracks or rust requires replacement. Attempting to salvage it may only provide a temporary solution.

(conclusion): Get Your Garbage Disposal Fixed Right: Reliable Repairs for a Smooth-Running Kitchen

Several options exist for repairing garbage disposal based on budget, the severity of the problem, and DIY experience. It’s crucial to address the issue promptly to prevent additional damage and safety risks. Knowing reliable repair services provides peace of mind for any future breakdowns.

Hiring professionals like Gray Plumbing ensures a reliable, one-time fix for your garbage disposal. With expertise in disposals and plumbing, they swiftly resolve issues, ensuring worry-free usage. Call us now at  (707) 600-2969 to receive your free quote or check or coupons here to save on your next service with us!

How Much Does It Cost To Repair A Garbage Disposal?

How Much Does It Cost To Repair A Garbage Disposal

Fixing the majority of garbage disposals will cost you approximately $250, including labor. This sum might be anything from $70 and $400. However, a plumber’s delivery cost may range anywhere from $60 to $100 an hour, depending on the specialist. Although the prices of individual components might vary widely, in almost every case, they are far more affordable than the entire replacement. It will cost around $150 only for the supplies to make a whole new device. 

Garbage disposals are a helpful appliance that may swiftly eliminate garbage from your dinner plate, but they are also capable of causing some issues on occasion. This blog will assist you in calculating your typical costs and determining if the repair is something you can DIY or should be left to a professional.

Most Common Repairs For Garbage Disposals

Garbage disposals may cause various difficulties, ranging from electrical to plumbing concerns. You may be able to tell what’s wrong and estimate how much it will cost to repair if you know what they are and investigate them yourself.

Jammed Garbage Disposal 

Did you flush anything wrong? Something is trapped within a humming appliance. Unclog the blades to make them operate. Clogged garbage disposal is a common cause to contact a plumber. If there’s no structural damage, a plumber should be able to repair the disposal. System repair costs $75-$100. Most plumbers complete in an hour. 

Unpowered Garbage Disposal 

You expect to hear the blades cut food when you turn on the garbage disposal. It needs power. However, power supply problems indicate quiet. You can probably solve this yourself. Before calling a plumber, check sure the disposal isn’t disconnected. Resetting may also help. If neither approach works, check for a tripped breaker. 

Drain Clog 

A pipe obstruction is likely to be blamed if your sink overflows while using the garbage disposal. Food particles caught in the line might slow sink draining. Plumbers utilize snake-like tools to unblock pipelines. Depending on the size and the location of the blockage, it might be difficult for a specialist. A blocked garbage disposal may influence other household areas. You don’t want an overflowing toilet or washer because you didn’t repair the sink. The overall cost should be $150-200, depending on the line length. 

Garbage Disposal Leak 

After running the garbage disposal, do you see a puddle? Have plumbing problems? See whether tightening the connectors and bolts fixes the problem. If so, you’re done! A worn seal may be the cause of a leaking unit. Should you replace the seal? No. Fixing the seal will address the issue today, but a worn-out seal indicates outdated disposal. Replacing the device is more cost-effective than repairing it. Depending on the model, new garbage disposal costs $185-400.

If your garbage disposal is having issues, it can cause a lot of frustration in the kitchen and even severe damage to the plumbing or cabinet in your sink. Call our experts at Gray Plumbing for a quote on how much it will cost you—the sooner we come out, the less costly repairs tend to be!


How To Deal With A Garbage Disposal Leak

How To Deal With A Garbage Disposal Leak

After dinner, as you’re doing the dishes, you notice a leak from your garbage disposal when you open the cabinet beneath the sink to get something. It turns into a stinky situation fast. Yikes! 

In the worst case, it might lead to significant water damage. Garbage disposal leaking from the bottom is a common problem many homeowners face. Your garbage disposal could be acting up for several reasons. Still, most of them include how well you’ve been taking care of the disposal.

You can take quick action before the leak gets out of control and causes a mess in your kitchen by understanding how to fix the leaky garbage disposal. This article will cover some of these typical causes and self-help solutions. But suppose none of those solutions seem to help, or the problem persists. Then, mainly if flooding occurs in the area under your kitchen sink, it might be time to call a plumber.

Signs Of A Garbage Disposal Leak Include:

  • You hear dripping from underneath your sink when you run the garbage disposal.
  • Putrid or rotten food odor comes from the cabinet underneath the sink.
  • The cupboard under the sink is wet.
  • Under the sink, there is flooding.

What’s Causing My Garbage Disposal To Leak?

This device breaks down organic material into tiny particles that can safely and effectively be poured down a standard kitchen drain. However, if you notice leaking, you may have steadily overused this appliance. Many things and materials commonly crammed into these appliances, like bones, grease, meat leftovers, potato peels, and eggshells, are not meant for them.

The motor, cutting blades, and other garbage disposal parts must handle a load they were not intended for when these or other rigid materials are put into the disposal. Leaking garbage disposals commonly indicate that the appliance has suffered from wear and tear. However, regular use over time can cause any garbage disposal to start leaking.

How To Stop The Garbage Disposal Leak

Bottom Leak: The garbage disposal’s internal seal may have been damaged; these seals tend to wear out over time. You might need to install a new garbage disposal in this situation. If your disposal is not still covered by warranty, buying a new one would be better than spending the time, effort, money, and to repair the internal seal.

Top Leak: If this is the case, your sink’s putty or flange is probably worn out and no longer maintaining the seal. In this situation, you will need to unplug the garbage disposal unit, remove the old flange or clean off the crumbling putty, and then reseal it with the new or brand-new putty.

Side Leak: The drain lines attached to the garbage disposal side are a common source of these leaks. In this situation, try tightening the metal clamp that joins the lines from the garbage disposal to the dishwasher with a screwdriver. Alternately, you might need to replace the rubber gasket. You can also use the main drain line screws and tighten them there.

Hire Gray Plumbing for professional repair work any time of the day or year. We provide high-quality assistance when your garbage disposal leaks, jams, makes strange noises, or has other plumbing issues. In addition to providing prompt, high-quality replacement services, our plumbing experts are happy to suggest a model that meets your needs and configuration.

Call us at (707) 600-2969 to schedule an appointment or submit an online estimate request for expert repairs of leaking garbage disposals and other under-sink plumbing leaks.

How to Install Double Kitchen Sink Plumbing With Garbage Disposal

Let’s be honest: regardless of your age, you will experience aging. Picking up food leftovers by hand is nasty. However, if you want to avoid having your kitchen sink clogged, you must deal with the problem in some way. So, are you sick of scraping the remains of a once-delicious food into your garbage can?

Double Kitchen Sink

Nothing is more inconvenient than dealing with food waste on a consistent basis, as anyone who has worked in a kitchen knows. Not to mention how many times you’ve messed up a meal and had to scrape over-cooked food from the bottom of pans and pots. If you want to get rid of all of these issues, there is only one solution: install a garbage disposal

Having this combined with your sink is just the finest conceivable thing you can do in such a situation. However, understanding how to plumb a double kitchen sink with disposal and dishwasher is not always straightforward. Fortunately for you, our Napa trash disposal installation experts will tell you everything you need to know right here!

Step 1: Clean the cabinet beneath the sink in the kitchen. 

The kitchen cabinet should be clean so that you can work on it easily.

Step 2: Disconnect the circuit breaker. 

Examine the circuit breaker connected to the disposal system and turn it off. Before you begin, be sure there is no power flowing through the wiring. To validate, use the voltage tester.

Step 3: Remove the couplers that link the drain extension pipe and the p-trap. 

To complete this process, use slip pliers. Next, store these drain parts in a secure location. To prevent a nasty odor from invading your kitchen, place a piece of cloth in the drain.

Step 4: Remove the nuts from beneath the drain coupling.

Make use of your pliers to complete this task. When it’s sufficiently loose, you can remove it by pushing it up. Remove the drain flange from the lower portion of the sink and set it aside.

Step 5: Remove a portion of the puffy residue from the drain opening using a scraping motion. 

Make use of the scraping knife to get the job done.

Step 6: Make use of fluffy.

Puffy should be applied liberally around the flange of the waste disposal device.

Step 7: Attach the flange to the pipe.

Insert the flange into the hole in the sink that is designated for it. The mounting ring is used to keep it in place.

Step 8: Tighten the disposal unit.

Using a screwdriver, tighten any screws that need to be tightened. Finally, you’ve completed the installation of your waste disposal equipment.

Double kitchen sink plumbing is a terrific method to save space while also increasing the utility of your kitchen. You can simply accommodate two normal kitchen sinks in the same space by installing double kitchen sink plumbing. This not only makes your kitchen more organized and easy, but it also cuts down on the time you spend cleaning up spills and stains. Contact Gray Plumbing if you want to install a double kitchen sink plumbing with garbage disposal.

How to Install a Garbage Disposal in 7 Steps

Garbage disposal are a great way to help homeowners like you keep kitchen wastes from going into landfills. Food scraps and other types of trash can be put into the disposer to help grind up the garbage and convert it into a much smaller size, so they can then easily pass through your kitchen’s drain system. While garbage disposals are great for helping you manage food waste, they should be installed by professional Napa plumbers to ensure they will last a long time and not damage your home or plumbing.

Garbage Disposal Leaking

However, if you want to save money and do it yourself, installing garbage disposal is one of the simplest jobs you can accomplish naturally. There are some basic procedures that need to be done right to ensure it functions as it should. We at Gray Plumbing provide you with these steps for your Napa garbage disposal installation.

Step One: Dismantle the Existing Drain

Turn off the sink’s water supply. If you already have an outlet to power the disposal, you may wish to shut power to that circuit immediately as well. Remove the existing waste (drain) pipe (or pipes, if you have a two-bowl sink) that links at the sink strainer, and the wall or floor threaded fitting (the stub out). If the piping is plastic and has compression or “threaded-type” fittings, save it for possible reuse. Toss the pipe if it is welded or made of metal. Fittings can be unscrewed by hand or with groove-joint pliers. Cut a welded pipe with a hacksaw.

Step Two: Remove the Sink Strainer

Remove the sink strainer—the fitting that holds the filter in place on the sink basin (one type is held with a large lock nut, a different kind with three screws)—screw in the flange that came with the garbage disposal to take its position. Prepare a lengthy piece of plumber’s putty to fit around the flange’s base. Once you’ve done so, add some putty under the flange’s lip before inserting it tightly into the drain hole so that it forms a seal with the sink bowl.

Step Three: Install Mounting Assembly

Our team of professional Napa plumbers instructs you to install the mounting assembly gasket and the mounting and retention rings onto the flange and tighten the screws to secure the assembly. Install one screw at a time, gradually increasing the number of screws until the gasket and sink flange are both securely fastened to the sink bowl (see illustration). Using a rag or paper towels, wipe away any excess putty from the area surrounding the flange inside the sink.

Step Four: Install the Disposal

Install the disposal to the flange. Connect the drain elbow. If you have a dishwasher, follow the manufacturer’s directions for preparing the disposal drain. Slip the slotted flange of the disposal over the mounting bolts. As directed, connect the disposal’s discharge tube. For your Napa garbage disposal installation, you may need to connect its power cord to the unit itself. All wiring connections are usually easier to make at this point in the procedure before mounting the garbage disposal. 

Step Five: Install the Garbage Disposal

The mounting ring, flange, and fiber gasket from the previous disposal are used to install a garbage disposal. These are the identical screws that were used to remove the old disposal from the sink cabinet. Two are on the top of the sink, and one is near the back of the sink, alongside the garbage disposal bottom plate. Check that the rubber gasket is properly positioned in the mounting ring before placing the screws. This will ensure a perfect drain fit.

Step Six: Connect to the Power

Connect the garbage disposal to a grounded 15- or 20-amp circuit, depending on the model. To use the unit, you’ll need to install or have an outlet installed under the sink. Please note that some versions may not come with a power cord. So you must attach it yourself. Follow the manufacturer’s directions for connecting electrical connections. Essentially, connect the cord’s white wires to the disposal’s white wires, the black wires to the disposal’s black wires, and the ground line to the disposal’s ground connection.

Step Seven: Power On And Test

To ensure that your Napa garbage disposal installation is operational, turn on the power button and cold water at the circuit breaker, and then fill the drain. You’re in good condition if your drain is clean and your p trap isn’t leaking.

After going through these guidelines, you may still want to consider contacting a skilled plumber. Our Gray Plumbing team has experienced professionals who are licensed to handle any problem with your garbage disposal. We employ efficient ways to get your garbage disposal installed quickly and expertly. Call us immediately, and we will gladly answer any questions you have regarding pricing, scheduling, and warranties – anything!


Who Installs A Napa Garbage Disposal Plumber Or Electrician?

Every property has a drainage disposal system which must be routinely maintained for optimum functioning. And, for the garbage disposal to work seamlessly, who installs a NAPA garbage disposalplumber or electrician?

Garbage Disposal Leaking

This equipment is installed and maintained regularly by expert plumbing professionals. Without the appropriate care and maintenance, the garbage disposal could bring a host of inefficiency and costly repairs.

Garbage Disposal & Plumbing

Efficient plumbing and drainage system is responsible for a seamless water flow from the building and waste material is carried out straight to the drainage system. Due to these features, it is required to continuously check and monitor the system for better functioning. Seasoned napa garbage disposal installation plumbers can safely fix any problems related to the drainage system with high efficiency. 

Trusted napa garbage disposal installation companies also offer some other added plumbing services including garbage disposal repair and installation. It is a basic service and must be handled carefully. 

About Garbage Disposals Installation

There are many household items in your kitchen which get a lot of attention. The newest energy-efficient refrigerator, stove, and even the dishwasher get a lot of attention. Among all of these, one of the most underrated equipment of all is the garbage disposal. You will likely never even think about it until there is a problem with it and you will have to invest time into a new Napa garbage disposal installation

For the most part, you will be trying to replace the old one because the motor has gone out or it will not unclog unlike the one you currently own. Fortunately for you, the process of a new Napa garbage disposal installation is a fairly straightforward process. The models are mostly made in the same way. You will go through three easy steps to install the new system. First you will have to prepare to get started including purchasing a new garbage disposal. You will then have to go through the process of garbage disposal removal. 

Last, but not least, you will have to contact a professional for Napa garbage disposal installation. Once you have it, you will have a brand new garbage disposal that you are not likely to ignore again. 

Hire A Plumber For Garbage Disposal Installation

Much like the other household items in your home, the garbage disposal system in your sink also experiences technical issues. It is very frustrating to experience having it break down although it is quite easy to clean it and remove the wastes found in it. Attempting to fix your garbage disposal is not as complicated as you think it is. Anyone can actually do this easily but you’ll definitely need a professional Dixon plumbing specialist for major issues. Below are  some tips you need to learn about your garbage disposal system in your kitchen sink.

Before you get down to the business of repairing your disposal, you must know the dos and don’ts of it. Keep in mind that you should be always aware of where the motor and the motor blade are located underneath your drain. Be sure to check that you always unplug it first before starting a Dixon plumbing repair job on your garbage disposal.

Plumbing Issues Can Be Avoided Early On

If you take care of your plumbing system, you will provide a convenient life for your family. The plumbing system is like the bloodline of the house. You will need it in every step of your daily life. From water distribution, to the waste disposal system, everything should be in its best conditions so as to assure a comfortable life without any mess.

Proper plumbing maintenance is necessary every month so that both the significant and insignificant faults can be diagnosed in the system. This venture will help you to save a lot of resources. It is easier to find a specialist for Dixon plumbing and get the problems fixed right away.

Plumbing Maintenance Checklist

Here is the list of plumbing checklists one needs to go through so as to avail professional help from the plumbing services whenever needed:

General

Check the pressure of water biannually. Find out whether the system is exerting excess stress on the plumbing system of your home. It can be done easily by using a pressure gauge. It can also be done by the expert plumbing companies near me.

Kitchen

Find the leaks in the kitchen sink. It is the most used part of the kitchen that has to tolerate a lot of wear and tear. Check the faucet, strainers, the link with the garbage disposal, and other accessories linked with the sink.

Drain Pipes And Garbage Disposal

The garbage disposal needs to be checked properly for leaks. The kitchen sink drain should be cleaned regularly using a home drain cleaner so as to keep the pipes unclogged. Any type of clogging can lead to excess pressure on the pipe and water retention. This, in the long run, can cause damage to the pipes.

Why Is My Garbage Disposal Leaking?

Garbage Disposal LeakingLet’s be honest, no one enjoys taking out the garbage lest dealing with a garbage disposal leaking. It could be your garbage disposal is leaking from the top or your garbage disposal leaking from the bottom or it could be your garbage disposal is leaking water.

It does not matter what the issue is, in this article we have outlined some of the most common causes of garbage disposal leaking and added a little extra on how to fix a leaking garbage disposal.

7 Reasons Why Your Garbage Disposal is Leaking

Your gaskets are worn out

This is the most common reason why your garbage disposal is leaking. The gasket is as a seal that fills the space between multiple surfaces. The aim of a gasket is to prevent leakages into or from the joint surfaces whilst being compressed.  When the garbage disposal is leaking, it might be because the gasket that’s been between the rubber seal and the flange is worn out. To check, simply run your hand by the gasket and if there is any water, it is time to swap it out!

Gaskets can get worn out by overuse over the years. As time passes by, they tend to get weak and will drip water. Also, if you do not use your disposer often, your gasket could dry up and leak. Another reason your gasket could be leaking is because it was applied improperly between the surfaces.

How to fix garbage disposal leaking due to worn out gaskets:

  • First begin by purchasing a new gasket from the store close to you. If you can, get the exact type of gasket you were using before to ensure the swap happens without any issues.
  • Remove the rain and detach the plug from the garbage disposal unit
  • Remove the drain hose connecting the disposer and the dishwasher
  • Rotate the sides of the mounting nut clockwise to unlock the disposer. This will allow you to locate the faulty gasket within the machine.
  • Remove the faulty gasket and fix the new one there. If you were able to get an exact match, you should not have any issues whatsoever and it should pop on the lid comfortably. It is important that your gasket is sitting in a flat position.
  • Take the garbage disposal to its original position on the sink and test the gasket seal properly before you reinstall the disposer.
  • Ensure all the grooves are tight and attach the drains and insert the plug back to the garbage disposal unit


Your Sink Flange is Leaky

The sink flange can be described as the collar that surrounds the drain. It is made of metal or it could be made of plastic but coated in metal. The flange helps your drain avoid getting backed up with dirt. If you notice your garbage disposal leaking water from this spot, then you have a leaky flange.

How to fix garbage disposal leaking due leaky sink flange:

  • Dismantle the garbage disposal unit by removing the screws that connect the drain pipe to the disposal unit. Remove the screws securing the metal clamp that connects the dishwater hose to the disposal then remove the dishwater hose and tubing from the unit.
  • Detach the mounting ring that connects the disposal to the mounting component and remove the garbage disposal.
  • Use a wrench to take out the bolts in the mounting assembly and remove the unit when you are done.
  • Raise the flange and remove the existing putty at the top of the sink flange and clean with cloth.
  • Take a handful of putty and form a rope that fits the length of the flange.
  • Place the molded putty around the flange and take the flange to the sink drain and fix it in
  • Affix the bolts and screws to the mounting ring, assembly and don’t forget to ensure they are tightened.
  • Finally, reinstall the drainpipe, dishwater hose and disposal unit.


Shaky Drain Lines

Because your disposal unit can also leak from its drain line, it is important to locate the spot where the appliance meets the line. You should notice a thicker line which is for sewer disposal and the thin line is the dishwater disposal line. If you notice any water on either of these lines, take a screwdriver and tighten the screws that are used to hold the machine to the dishwater.

It is also important to secure the screws on the thin line as well and replace your gaskets with brand new ones. During this inspection, keep an eye out for wearing out of these parts as constant use can cause them to develop cracks that can cause leakages.


You have loose pipes or seals

Let’s face it, you probably have multiple pipes here so locating the erring pipes might be a little difficult. Going through the pipes and seals under your sink will be helpful here. This is the location where the disposal pipes could have taken a hit causing the pipes to shift from their original position.

When this happens, the bolts and screws holding the machine together will become loose and dripping would happen at the location. Once you’ve identified the defective seals/pipes, you can choose to change the pipes or apply putty at the leaky spots.


Faulty Dishwater Connection

Your garbage disposal machine could be leaking because of a faulty connection between the dishwater and the drainpipe. It could also be that the hose taking food waste into the garbage unit could be cracked or loosed. You can fix this by changing the hose or applying putty around the leaky area.


Cracked body

You’ve changed your gasket or your flange and the discharge is still continuing? The next step is to check the body of your unit for any cracks. If you are able to spot any cracks, you might need to change your whole unit. Such cracks might be difficult to fix and a complete replacement might be your best option.